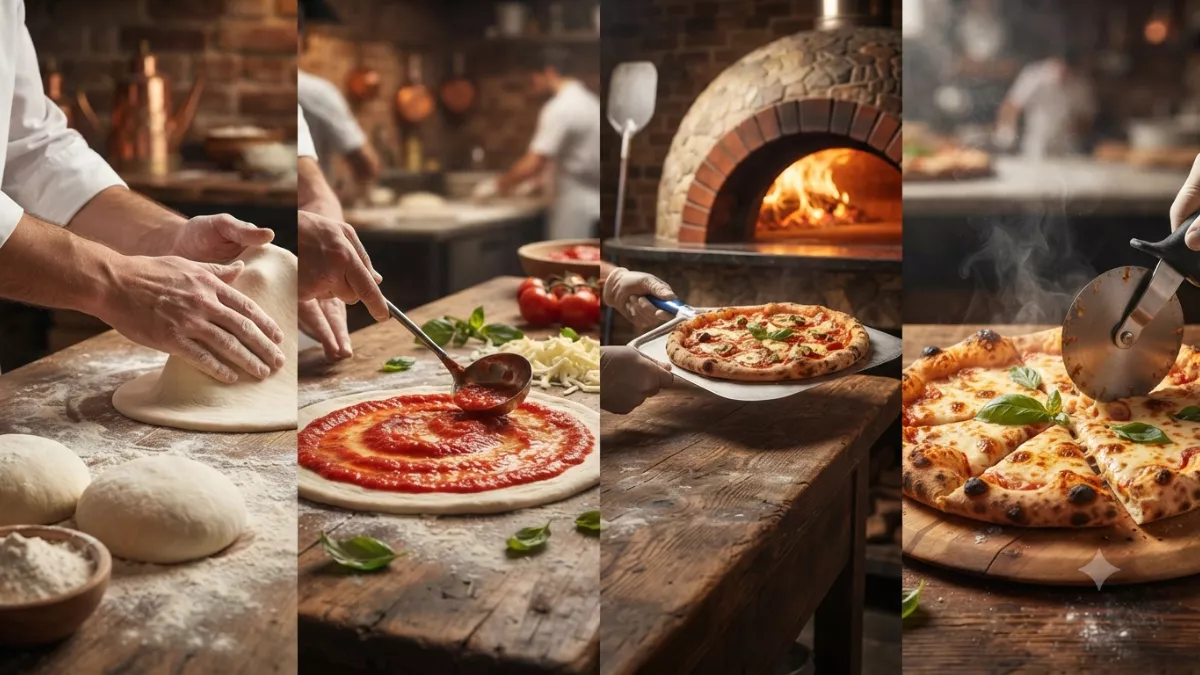
A great pizza may look simple when it arrives at the table, but every slice represents a series of carefully connected steps.
Before there is a golden crust, melted cheese, rich tomato sauce, and flavorful toppings, there is simply flour, water, yeast, and salt. These basic ingredients go through mixing, kneading, fermentation, shaping, topping, and baking before becoming the pizza we recognize.
The quality of the final slice depends on how these stages work together.
A perfectly baked pizza cannot completely fix poorly fermented dough. Excellent toppings cannot compensate for an overly thick crust. Even a delicious sauce can cause problems if it adds too much moisture.
Understanding the complete journey from dough to slice makes it easier to understand why great pizza tastes and feels different.
In this guide, we’ll walk through the complete pizza-making process, from choosing ingredients and preparing dough to fermentation, shaping, topping, baking, slicing, and serving.
What Makes a Great Pizza?
Before looking at the individual stages, it helps to understand what we’re trying to achieve.
A well-made pizza generally has a balance of:
- A flavorful crust
- A crisp or properly baked exterior
- A tender or chewy interior
- Balanced tomato sauce
- Well-melted cheese
- Complementary toppings
- Proper seasoning
- Good moisture control
The exact texture depends on the pizza style.
A thin New York-style pizza will not have the same structure as a thick Detroit-style pizza.
A traditional high-temperature pizza will behave differently from one baked in a standard home oven.
There isn’t one definition of a perfect pizza.
Instead, each style has its own characteristics.
Step 1: Choosing the Right Ingredients
Every pizza begins with ingredients.
The basic dough usually contains flour, water, yeast, and salt.
Some recipes also include olive oil, sugar, or other ingredients depending on the desired style.
Flour
Flour provides the structure of the dough.
Different flours contain different amounts and types of proteins, which influence gluten development and dough strength.
A strong flour can help create a dough capable of holding fermentation gases.
Water
Water hydrates the flour and allows gluten-forming proteins to interact.
The amount of water also affects dough texture.
Higher-hydration doughs can produce a lighter, more open structure but may be more difficult to handle.
Yeast
Yeast drives fermentation.
It consumes available sugars and produces carbon dioxide and other fermentation byproducts.
The gas becomes trapped within the developing gluten structure.
Salt
Salt contributes flavor and also influences dough development and fermentation.
It is a small ingredient with a significant role.
Step 2: Mixing the Dough
Once the ingredients are measured, they need to be combined.
Mixing distributes the ingredients and begins the formation of the dough structure.
At first, the dough may look rough and uneven.
As flour absorbs water, the mixture becomes more cohesive.
The goal isn’t necessarily to make the dough perfectly smooth immediately.
The dough will continue developing during resting and fermentation.
This is why rushing through the early stages isn’t always helpful.
Step 3: Gluten Development
Gluten is one of the key structural components of wheat-based pizza dough.
When flour and water combine, gluten-forming proteins interact.
Mixing and folding help develop a network that gives the dough strength and elasticity.
A properly developed dough can stretch without immediately tearing.
It can also retain some of the gases produced during fermentation.
Gluten development is important because it influences the final crust.
A weak dough may spread excessively.
An overly tight dough may resist stretching.
The goal is to develop enough structure for the pizza style you’re making.
Step 4: Resting the Dough
After mixing, dough often benefits from a resting period.
During this time, flour continues absorbing water and the dough structure begins to relax.
Resting can make the dough easier to work with.
A dough that initially feels tight may become more extensible after resting.
This is one reason pizza makers don’t always immediately shape dough after mixing.
Time is an important ingredient in pizza.
Step 5: Fermentation Begins
Fermentation is one of the most important stages of pizza making.
Yeast consumes fermentable sugars and produces carbon dioxide along with various flavor compounds.
The carbon dioxide becomes trapped inside the dough.
This creates small pockets of gas.
As fermentation continues, the dough becomes more aromatic and develops a more complex structure.
The exact fermentation time depends on the recipe.
Factors include:
- Yeast quantity
- Dough temperature
- Flour
- Hydration
- Room temperature
- Refrigeration
- Desired pizza style
Step 6: Why Longer Fermentation Can Change Pizza
Time can significantly influence dough.
A longer fermentation can allow additional flavor compounds to develop.
It can also change the dough’s handling characteristics.
However, longer does not automatically mean better.
If fermentation continues too far, the dough can become weak and difficult to handle.
The goal is controlled fermentation.
Good pizza dough is the result of managing time rather than simply maximizing it.
Step 7: Dividing and Balling the Dough
Once the dough has developed sufficiently, it can be divided into individual portions.
Each portion is shaped into a dough ball.
Balling creates a relatively smooth outer surface and organizes the gluten structure.
The dough balls are then allowed to rest or continue fermenting.
Properly portioned dough makes it easier to create pizzas of consistent size.
Step 8: Preparing the Pizza Sauce
While the dough develops, the sauce can be prepared.
A basic pizza sauce may include tomatoes, salt, herbs, garlic, and olive oil.
Some sauces are cooked.
Others use tomatoes with minimal cooking.
The choice depends on the pizza style.
The most important thing is balance.
A good sauce should provide:
- Tomato flavor
- Acidity
- Natural sweetness
- Savory depth
- Appropriate seasoning
Too much sauce can make pizza wet.
Too little can make it taste dry.
Step 9: Choosing the Cheese
Mozzarella is one of the most popular pizza cheeses, but there are many options.
Fresh mozzarella provides a soft, creamy texture and relatively high moisture.
Low-moisture mozzarella melts more predictably and can develop attractive browning.
Other cheeses can be added for flavor.
Parmesan, provolone, fontina, ricotta, and other cheeses can create different combinations.
The key is to consider moisture, fat, melting behavior, and flavor.
Step 10: Preparing the Toppings
Toppings should complement the pizza rather than overwhelm it.
Common toppings include:
- Pepperoni
- Mushrooms
- Onions
- Bell peppers
- Sausage
- Olives
- Tomatoes
- Basil
- Spinach
- Roasted vegetables
Some ingredients benefit from pre-cooking.
Mushrooms, for example, contain significant moisture.
Pre-cooking can help remove some water before they go onto the pizza.
The same principle applies to other ingredients that could release excessive moisture during baking.
Step 11: Shaping the Dough
This is where the dough finally begins to look like pizza.
A fermented dough ball is gently opened and stretched.
The goal is to create the desired diameter and thickness without damaging the structure unnecessarily.
For many pizza styles, preserving some gas around the outer edge helps create a lighter crust.
This is why aggressive rolling can produce a different result from gentle hand stretching.
Why avoid crushing the edge?
The outer edge often contains valuable fermentation gases.
Preserving some of these bubbles can help create a more open and airy crust.
However, different pizza styles use different shaping techniques.
Step 12: Building the Pizza
Once the dough is shaped, toppings need to be added efficiently.
Start with sauce.
Spread it evenly while leaving an appropriate border around the edge.
Add cheese.
Then distribute toppings carefully.
Avoid creating an excessively heavy center.
Remember that every ingredient contributes moisture and weight.
The goal is balance.
Step 13: Why Topping Quantity Matters
More toppings do not automatically mean better pizza.
An overloaded pizza can become difficult to bake properly.
The center may remain soft while the outer crust becomes overly browned.
Too many toppings can also hide the flavor of the dough.
A carefully selected combination of ingredients often produces a more balanced pizza than a large collection of unrelated toppings.
Step 14: Preheating the Oven
The oven is one of the most important pieces of equipment.
Pizza generally benefits from strong heat.
A properly preheated oven allows the dough to expand rapidly and helps the crust brown.
If you’re using a pizza stone or steel, it also needs enough time to heat thoroughly.
A surface that is only moderately warm may not transfer enough energy to the bottom of the dough.
This can result in a pale or soft underside.
Step 15: The Pizza Enters the Oven
This is where many processes happen at once.
As the dough heats:
- Gases expand
- Water begins turning into steam
- Gluten sets
- Starch gelatinizes
- The crust expands
- Moisture escapes
- Browning begins
This transformation can happen very quickly in a hot oven.
The raw dough gradually becomes a structured crust.
Step 16: Oven Spring
During the early stages of baking, the dough can experience rapid expansion known as oven spring.
Gas trapped inside the dough expands.
Water turns into steam.
The combination contributes to the increase in volume.
This is why the outer crust can suddenly puff up after the pizza enters a hot oven.
The quality of oven spring depends partly on fermentation and dough structure.
Step 17: Crust Browning
As the surface dries and becomes hot enough, browning reactions begin.
The Maillard reaction contributes to the development of complex roasted aromas and flavors.
Sugars can also participate in caramelization.
Together, these processes create the golden-brown appearance associated with a well-baked crust.
The crust is not simply becoming darker.
It is developing new flavor compounds.
Step 18: Cheese Melting
While the crust develops, the cheese undergoes its own transformation.
Mozzarella softens and melts.
Fat becomes fluid.
Water moves through the cheese structure.
The surface may begin to brown depending on temperature, cheese type, and baking time.
Fresh mozzarella tends to remain softer and creamier.
Low-moisture mozzarella can create a more uniform melted layer and often browns more easily.
Step 19: Managing Moisture During Baking
Moisture is one of the biggest factors in pizza texture.
Water comes from:
- Dough
- Tomato sauce
- Cheese
- Vegetables
- Meat toppings
The pizza must release enough moisture during baking to develop the desired crust.
This is why excessive sauce or wet toppings can make the center soft.
A great pizza is essentially a carefully managed balance of heat and moisture.
Step 20: Knowing When the Pizza Is Done
There isn’t one visual sign that works for every pizza.
Look for several indicators.
The crust should have developed the appropriate color.
The bottom should be properly baked.
The cheese should be melted.
The toppings should be cooked to the desired level.
The edges should have the texture associated with the pizza style.
For some pizzas, light blistering is desirable.
For others, a more evenly browned crust is preferred.
Experience helps you recognize the combination.
Step 21: Removing the Pizza
Once the pizza is baked, remove it carefully.
A pizza peel or appropriate baking tool can make this easier.
Allowing the pizza to sit briefly before cutting can help the cheese and toppings settle.
However, pizza is generally best enjoyed while still warm.
Step 22: Slicing the Pizza
Slicing may seem like the easiest step, but technique can influence presentation.
Use a sharp pizza cutter or suitable knife.
Cut through the crust cleanly rather than repeatedly dragging through the cheese.
The goal is to create slices that hold their structure.
Different pizza styles may be cut into different shapes and sizes.
Step 23: The First Bite
The final stage is eating the pizza.
A good slice should ideally provide a sequence of textures and flavors.
You may notice the toasted crust first.
Then comes the chewiness of the dough.
Tomato sauce provides acidity and sweetness.
Cheese contributes richness and creaminess.
Toppings add their individual characteristics.
The best pizzas don’t necessarily have the most ingredients.
They have ingredients that work together.
Common Mistakes That Can Affect the Final Pizza
Under-fermented dough
This can produce dense or less flavorful crust.
Over-fermented dough
This can create weak dough that is difficult to shape.
Too much flour during shaping
Excess flour can affect texture and may burn during baking.
Too much sauce
This can make the center wet.
Too many toppings
Heavy toppings can prevent even baking.
Insufficient oven preheating
A cool baking environment can lead to a pale crust.
Cutting immediately
Very hot cheese and toppings can shift when sliced too quickly.
How to Improve Homemade Pizza
If your homemade pizza isn’t turning out as expected, change one variable at a time.
For example, if the crust is too soft, consider:
- Increasing baking surface temperature
- Reducing sauce quantity
- Reducing wet toppings
- Adjusting dough thickness
- Improving oven preheating
If the crust is too hard, consider:
- Shortening the bake
- Adjusting hydration
- Reducing excessive flour
- Changing the baking temperature
- Reviewing fermentation
Small adjustments are often more useful than completely changing the recipe.
Why Time Is One of the Most Important Ingredients
Pizza is a food where time matters at nearly every stage.
The dough needs time to hydrate.
Gluten needs time to develop.
Yeast needs time to ferment.
Dough needs time to relax.
The oven needs time to preheat.
The pizza needs time to bake.
Even the finished pizza can benefit from a brief rest before slicing.
This is why great pizza isn’t simply a recipe.
It is a process.
From Dough to Slice: The Complete Journey
The journey can be summarized simply:
Mix → Rest → Ferment → Divide → Shape → Top → Bake → Slice → Serve
But each stage contains several smaller processes.
Flour becomes dough.
Dough becomes a fermented structure.
The fermented dough becomes a shaped pizza.
Heat transforms the raw pizza into a browned crust.
Cheese melts.
Sauce becomes integrated with the toppings.
Moisture escapes.
The final pizza becomes a combination of crispness, chewiness, creaminess, acidity, sweetness, saltiness, and savory flavor.
That’s what makes pizza such an interesting food.
Frequently Asked Questions
1. What is the first step in making pizza?
The first step is usually measuring and combining the dough ingredients. Flour, water, yeast, and salt form the foundation of many pizza dough recipes.
2. How long should pizza dough ferment?
Fermentation time depends on the recipe, yeast quantity, temperature, flour, hydration, and desired pizza style. There is no single fermentation time that works for every dough.
3. Why is fermentation important for pizza?
Fermentation helps develop dough structure, gas retention, aroma, and flavor. It also influences how the dough behaves when shaped and baked.
4. Why does pizza need a very hot oven?
High heat can help pizza cook quickly, develop oven spring, reduce surface moisture, and create desirable browning.
5. Why is my homemade pizza soggy?
Common causes include excessive sauce, wet toppings, insufficient oven heat, an inadequately heated baking surface, or an overly thick dough.
6. How do I get a crispier pizza crust?
Thoroughly preheat your oven and baking surface, control the amount of sauce and wet toppings, use an appropriate dough thickness, and bake until the crust is properly browned.
7. When should I slice pizza?
Pizza can generally be sliced shortly after coming out of the oven. Allowing it to rest briefly can help the cheese and toppings settle while keeping the pizza warm.
Final Thoughts
A great pizza is the result of many small decisions working together.
It begins with flour, water, yeast, and salt. Those ingredients become dough through mixing and hydration. Fermentation develops flavor and structure. Shaping determines the thickness and form of the crust. Sauce and cheese create the foundation of the topping layer. Carefully chosen ingredients add character.
Then the oven transforms everything.
Heat expands gases, creates steam, sets the dough, melts cheese, removes moisture, and develops the browning that gives pizza its familiar aroma and flavor.
Finally, the pizza is removed, sliced, and served.
Understanding this complete journey from dough to slice makes it easier to troubleshoot problems and improve your technique.
Whether you’re making pizza in a home oven or working with a professional pizza oven, the same fundamental principles apply: quality ingredients, controlled fermentation, balanced toppings, proper heat, and careful moisture management.
When those elements work together, even a simple pizza can become an exceptional slice.